Step-by-step technical guide to configure SAML 2.0 Single Sign-On between Okta (IdP) and Salesforce (SP), including My Domain, metadata, certificate creation, and user provisioning.
Introduction
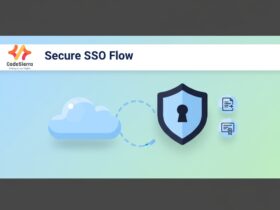
Single Sign-On (SSO) simplifies authentication across enterprise apps by allowing users to sign in once and access multiple systems. This guide walks through configuring Okta as the Identity Provider (IdP) and Salesforce as the Service Provider (SP) using SAML 2.0.
What is Okta?
Okta is a cloud Identity and Access Management (IAM) platform offering SSO and MFA. It centralizes user access and makes it easier to manage authentication across cloud and on-premises applications.
Core concepts
- SSO: One login to access multiple apps.
- SAML: XML-based standard for exchanging authentication assertions.
- Identity Provider (IdP): Authenticates users (Okta).
- Service Provider (SP): Consumes IdP assertions to grant access (Salesforce).
Step-by-step configuration
- Enable My Domain in Salesforce
Create a unique My Domain so Salesforce can expose an Assertion Consumer Service (ACS) URL for SAML responses.
- Configure Okta as an Identity Provider
In Okta Admin → Applications → Browse App Catalog → Add Salesforce. Choose SAML 2.0 as the sign-in method and follow setup instructions.
- Configure Salesforce SAML Single Sign-On
In Salesforce SSO settings, create a new SAML configuration. Typical values:
- Name: Okta SSO
- Issuer / Entity ID: take from Okta or use https://saml.salesforce.com (or your custom domain)
- SAML Identity Type: Assertion contains the Federation ID from the User object
- Identity Location: NameIdentifier
- Upload Identity Provider certificate (from Okta)
- Create signature certificate from metadata
Download the Salesforce metadata or Okta metadata as instructed. Extract the ds:X509Certificate value and wrap it with BEGIN/END CERTIFICATE lines to create a .crt file for upload.
-----BEGIN CERTIFICATE-----
MIID... (certificate contents)
-----END CERTIFICATE-----
- Update Salesforce login detail in Okta
Use Salesforce-provided Login URL and Logout URL in Okta Advanced Sign-On settings. Set application username format (Okta Username) and enable ‘Browser plugin auto-submit’ if desired.
- Upload Salesforce certificate to Okta
Upload the slo.crt to enable single logout and signature validation. Okta will then provide metadata URL, Sign-on URL, Sign-out URL, and issuer details.
- Update Salesforce SSO configuration
Paste the IdP Single Logout URL into Salesforce SSO settings and enable Single Logout. Save and verify endpoint URLs.
- Configure My Domain authentication
In Salesforce My Domain settings, add Okta as an authentication service so users can initiate login from the Salesforce login page.
- Provision and map users
Set the Federation ID on Salesforce User records to match the Okta username. Assign users to the Okta Salesforce application (manual or via import).
Best practices
- Test SSO in a sandbox before enabling in production.
- Keep certificates and metadata versions documented and monitor expiry.
- Use MFA in Okta to add an extra layer of security.
- Automate user provisioning with SCIM if possible to reduce manual Federation ID updates.
Troubleshooting tips
When SSO fails, check:
- My Domain/ACS URL accuracy.
- Matching Federation ID values between systems.
- Certificate validity and correct certificate upload.
- SAML assertion NameID format and location.
Conclusion
Configuring SAML SSO between Okta and Salesforce centralizes authentication, improves security, and streamlines access for users. Proper setup of My Domain, certificate handling, and user attribute mapping ensures a reliable SSO experience for admins and end users.
This post is categorized under Integration and is intended for Salesforce admins, identity architects, and developers implementing SSO.





Leave a Reply