
How to pass the Salesforce Flow recordId into a Screen Flow
We've all been there. You're building a screen flow to sit on an Opportunity page, and you need it to actually know which Opportunity it's looking at. To make that happen, you'll need to use a Salesforce Flow recordId variable. It's one of those day-one skills for any admin or dev, but there are a few ways to handle it that aren't always obvious if you're just starting out.
The core idea is simple: you want to tell the flow, "Hey, here's the ID of the record the user is currently looking at." Once the flow has that ID, you can use a Get Records element to pull in any other field you need. In my experience, this is much cleaner than trying to shove every single field into the flow at once.
How to set up your Salesforce Flow recordId variable
Before you do anything else, you have to create the variable inside the Flow Builder. But here's the catch - you have to name it exactly right. If you don't, Salesforce won't know where to put the data. I've seen plenty of people waste an hour debugging just because they used a capital 'I' or forgot to check a box.
- API Name:
recordId(it must be case-sensitive, all one word). - Data Type: Text.
- Availability: Check the box for "Available for input".
That "Available for input" part is vital. If you leave it unchecked, the flow is basically a locked room, and Salesforce can't drop the ID inside. Once that's set up, you have a few ways to actually use it.
1) Dropping the Flow on a Lightning Record Page
This is probably the most common way I use flows. You open the Lightning App Builder, drag the Flow component onto the page, and select your flow. If you named your variable recordId and set it as an input, you'll see a checkbox that says "Pass record ID into this variable." Check it, and you're done. Salesforce handles the rest.
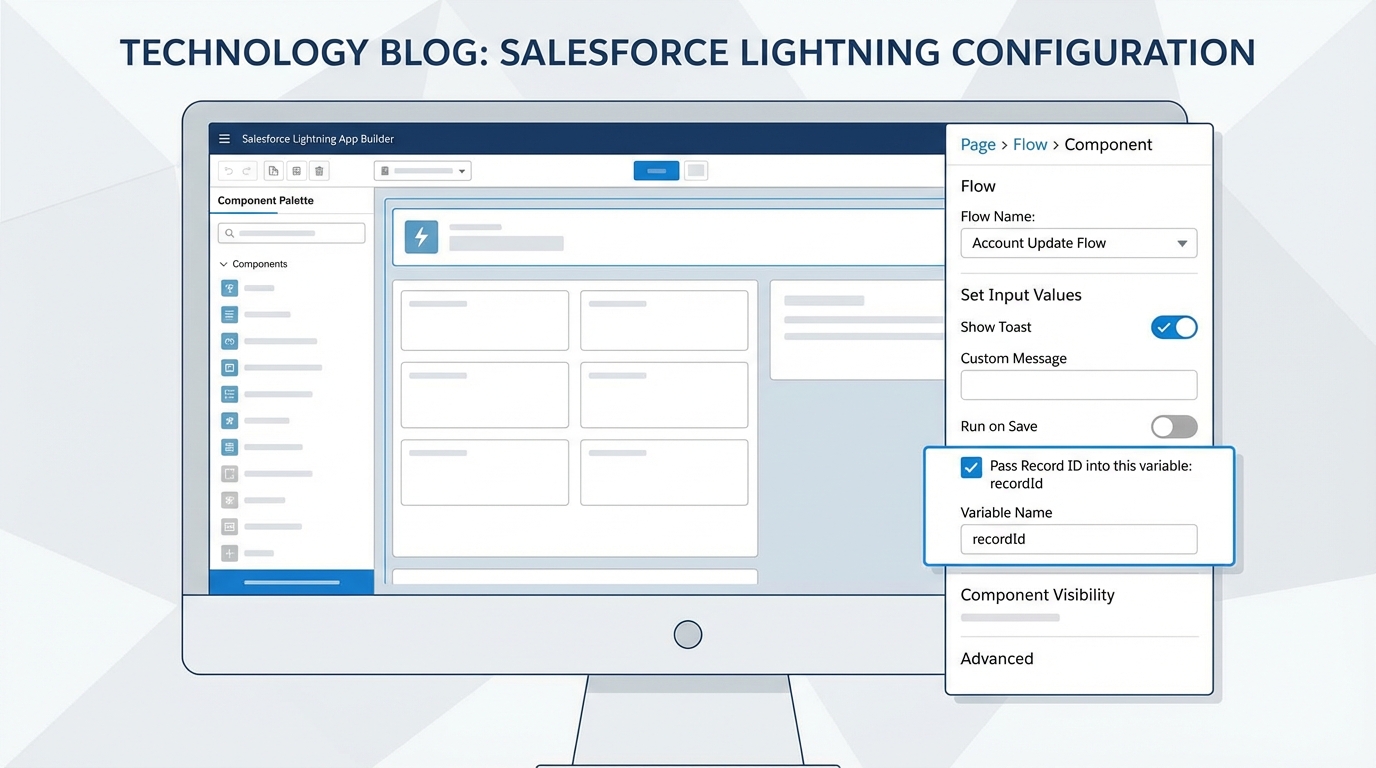
A close-up view of the Salesforce Lightning App Builder properties panel showing the configuration for passing a record ID into a flow.
2) Using Quick Actions
If you want your flow to pop up in a modal when a user clicks a button, you'll use a Quick Action. When you create a new action and choose "Flow" as the type, Salesforce is smart enough to look for that recordId variable. It passes the ID automatically. It's a great way to keep the UI clean while still giving users the tools they need.
3) Custom URL Buttons
Sometimes you're working in a more custom environment or even in Classic. In those cases, you might launch a flow via a URL. You just append the variable to the end of the URL like this:
/flow/Your_Flow_Name?recordId={!Account.Id}
But honestly, I try to avoid this unless I really have to. Hardcoding URLs can get messy when you're moving between sandboxes and production.
Passing the full record vs. the Salesforce Flow recordId
I get asked this a lot: "Can I just pass the whole record instead of just the ID?" The short answer? Yes, but you probably shouldn't. You can create a Record variable and set it to "Available for input," but this only really works well when you're launching a flow from Apex or a Lightning Web Component. If you're using the standard page builder, Salesforce is only going to give you the ID.
Pro tip: Always prefer passing the ID and using a Get Records element. It's more flexible, it respects Field Level Security better, and it makes your flow much easier to debug when things go sideways.
When you fetch the data inside the flow, you're in control. You decide exactly which fields you need. If you try to pass a full record from an LWC, you have to make sure every single field matches the flow's expectations. It's a lot of extra work for very little gain. If you're trying to decide between the two, check out this guide on Apex vs Flow to see where the boundaries are.
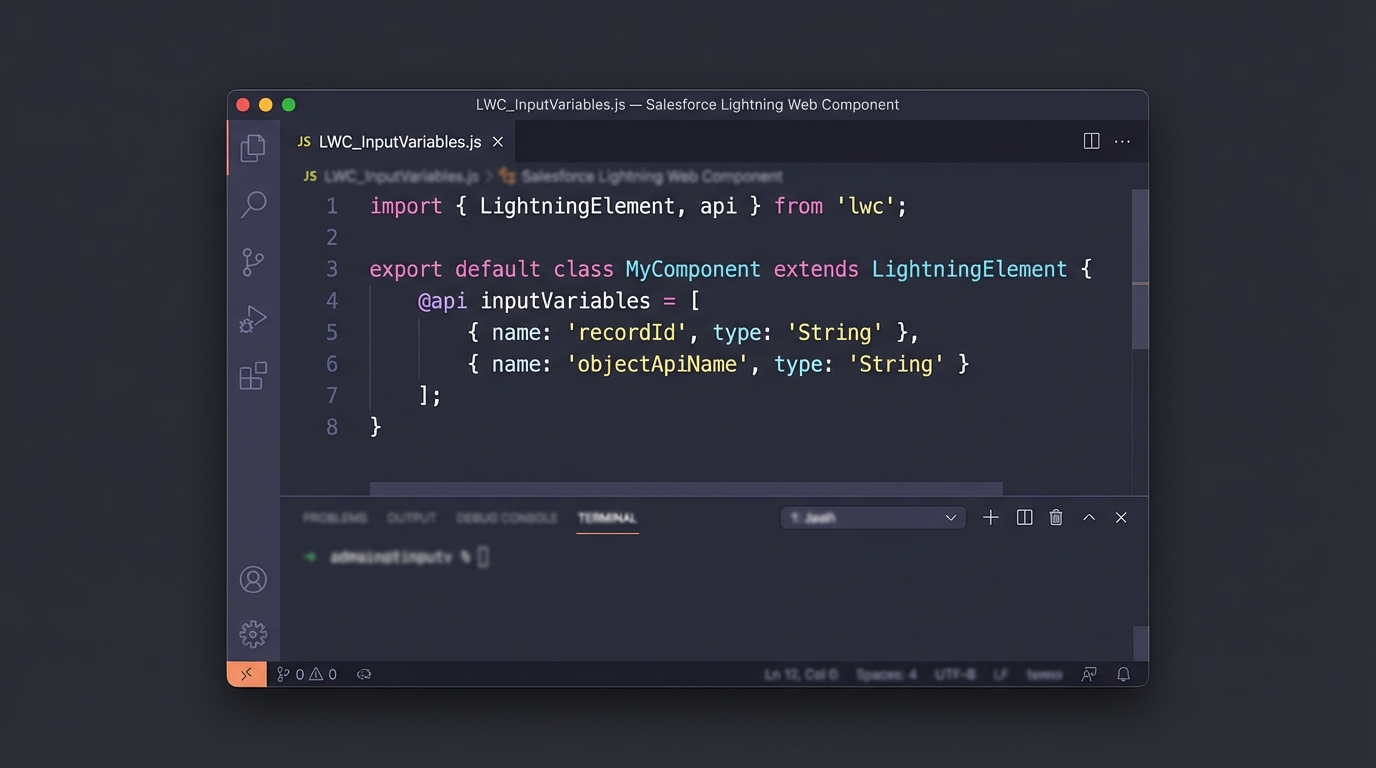
A high-quality image of a code editor showing JavaScript syntax used to initialize a Salesforce flow within a custom component.
Handling data in LWC or Aura
If you're a developer building a custom UI, you might need to start a screen flow from code. You'll use the lightning-flow component in LWC. Here's what that look like in your JavaScript:
const inputVariables = [
  { name: 'recordId', type: 'String', value: this.recordId }
];
It's straightforward, but again, make sure that name matches your flow variable exactly. I've seen teams get this wrong when they're rushing to hit a sprint deadline, and it's a pain to track down later.
Key Takeaways for Salesforce Flow recordId
- Naming matters: Always use
recordIdwith a lowercase 'r' and a capital 'I'. - Enable Input: Your variable must be "Available for input" or it won't work.
- Get Records is your friend: Pass the ID, then query the data you need inside the flow.
- Security first: Remember that flows usually run in the user context, so they'll only see what they have permission to see.
Following these steps will save you a lot of headaches. If you're looking for more ways to keep your automation clean, I highly recommend reading up on Salesforce Flow best practices. It'll help you build things that don't break the moment another admin touches them.
So, the next time you're setting up a screen flow, just stick to the recordId pattern. It's the standard for a reason. It's reliable, it's easy to teach to junior admins, and it just works across almost every part of the platform. Stick to the basics, and you'll spend a lot less time troubleshooting and more time actually building cool stuff.


Leave a Comment