Understanding Screen Flow vs Autolaunched Flow
Deciding between Screen Flow vs Autolaunched Flow is usually the first big hurdle you’ll hit when building out a new automation. I’ve seen plenty of admins get halfway through a build only to realize they picked the wrong type because they didn’t account for how the user would actually interact with the tool. It’s a frustrating mistake, but it’s easy to avoid once you know what to look for.
At its simplest, the choice comes down to visibility. Does a human need to see what’s happening, or should it happen silently in the background? If you’re still getting a handle on the basics, checking out a guide to Salesforce flow types can help set the stage, but here we’re going to focus on the specific trade-offs between these two heavy hitters.
The Core Differences: Screen Flow vs Autolaunched Flow
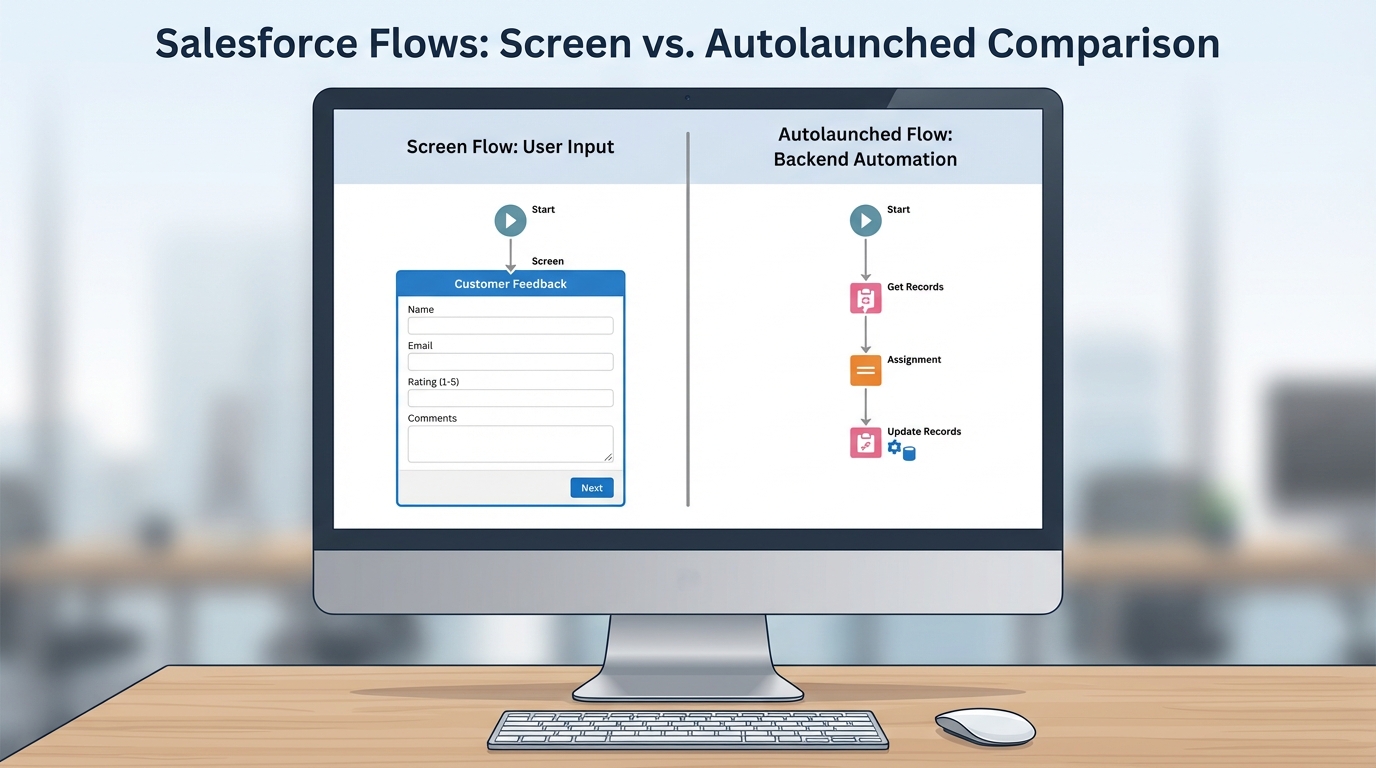
Screen Flows are built for interaction. They’re the only flow type that lets you use the “Screen” element, which is where you build your forms, display text, or let users upload files. You’ll usually see these launched from a button on a record page, a Quick Action, or even embedded right on a Lightning page. I’ve used them to build everything from simple “New Lead” wizards to complex multi-page applications that replace old Visualforce pages.
Autolaunched Flows are “headless,” meaning they have no user interface. They live for the logic. They run in the background, often triggered by something else – like a record being updated, a schedule, or even a call from Apex. One thing that trips people up is that “Autolaunched Flow” is a bit of a broad term in the Flow Builder, but the main takeaway is that they don’t have screens. If you need to crunch numbers or update 50 related records without the user ever knowing, this is your tool.
Execution and Context
This is where things get interesting. A Screen Flow almost always runs in the context of the user who clicked the button. If that user doesn’t have permission to edit a specific field, the flow is going to fail unless you’ve specifically set it to run in “System Context.” But even then, the user is the one driving the bus.
Autolaunched Flows are a different beast. Depending on how they’re triggered, they might run as the user or in the system context. For example, a record-triggered flow usually runs in the system context, which is great for ensuring data integrity without worrying about every single user’s profile permissions. But be careful – I’ve seen teams accidentally bypass security rules because they didn’t realize their background automation had “god mode” permissions.
Pro tip: If you find yourself building the same logic in three different Screen Flows, move that logic into an Autolaunched Flow. You can call it as a “Subflow,” which makes your life a lot easier when you need to change the logic later. You only have to fix it in one place.
Choosing Screen Flow vs Autolaunched Flow for Your Project
So how do you actually pick? I usually ask myself two questions. First, do I need input from a human that isn’t already on the record? Second, does this need to happen immediately after a specific event? If I’m building a guided experience for a sales rep to “Close-Win” an opportunity while capturing specific notes, that’s a Screen Flow every time.
But if I need to automatically create a set of tasks every time a new Account is created, I’m reaching for an Autolaunched Flow (specifically a record-triggered one). You’ll also use these when you’re working with Apex. Here’s a quick look at how you’d start one of these from code:
Map<String, Object> inputs = new Map<String, Object>{'recordId' => myId};
Flow.Interview.My_Background_Process flow = new Flow.Interview.My_Background_Process(inputs);
flow.start();
It’s simple, direct, and lets you keep your complex logic in Flow while using Apex for the heavy lifting. Following Salesforce Flow best practices means keeping your automation clean and easy to debug, no matter which type you choose.
Common Use Cases
- Screen Flow: Multi-step account setup wizards, custom “Delete” buttons with confirmation screens, and data collection forms for Experience Cloud sites.
- Autolaunched Flow: Nightly data cleanups, calculating totals across related records, and sending platform events to external systems.
Key Takeaways
- User Interface: Screen Flows have screens; Autolaunched Flows are headless.
- Triggers: Screen Flows are manual (buttons/actions); Autolaunched Flows are automatic (triggers/schedules/Apex).
- Context: Screen Flows usually follow user permissions; Autolaunched Flows often run in system context.
- Navigation: Only Screen Flows allow users to go “Back” or “Next.”
- Reusability: Use Autolaunched Flows as subflows to keep your logic DRY (Don’t Repeat Yourself).
At the end of the day, the Screen Flow vs Autolaunched Flow debate isn’t about which one is better – it’s about which one fits the job. If you need to talk to a user, go with a Screen Flow. If you need to talk to the database, go with an Autolaunched Flow. Once you get the hang of passing variables between them, you can build some pretty sophisticated systems without ever writing a line of code.