Look, everyone is talking about AI right now, but getting it in front of your customers is where the real value lives. Setting up an Agentforce Experience Cloud deployment is one of the fastest ways to see a return on all that configuration work you’ve been doing. I’ve spent plenty of time wrestling with old-school chat bots, and honestly, this is much smoother than the complex routing we used to deal with.
In a busy service environment, you don’t want your team stuck answering the same five questions every single day. By putting an agent on your public site, you’re giving customers accurate answers 24/7 without needing a human to stay up all night. It’s about reducing that repetitive load so your team can focus on the hard stuff. Here’s how we actually get it done.
Why you should use Agentforce Experience Cloud for self-service
So why does this matter? The short answer is speed. You can get a conversational interface live without a massive backend development project. I’ve seen teams try to build custom chat solutions from scratch, and it usually turns into a nightmare of API calls and maintenance. With this setup, you’re using the foundation Salesforce already built.
- Your support team stops getting buried under basic policy questions.
- Customers get answers immediately instead of waiting in a queue.
- The agent is always on, even on holidays or weekends.
- You can start small with just a few FAQs and grow from there.
Think about industries like airlines or utilities. They get hammered with questions about “How do I change my booking?” or “What’s the cancellation fee?” If you’ve already documented these policies, you’re halfway there. You can check out some other 8 practical Agentforce use cases to see how this fits into a broader strategy.
Getting your Agentforce Experience Cloud setup right
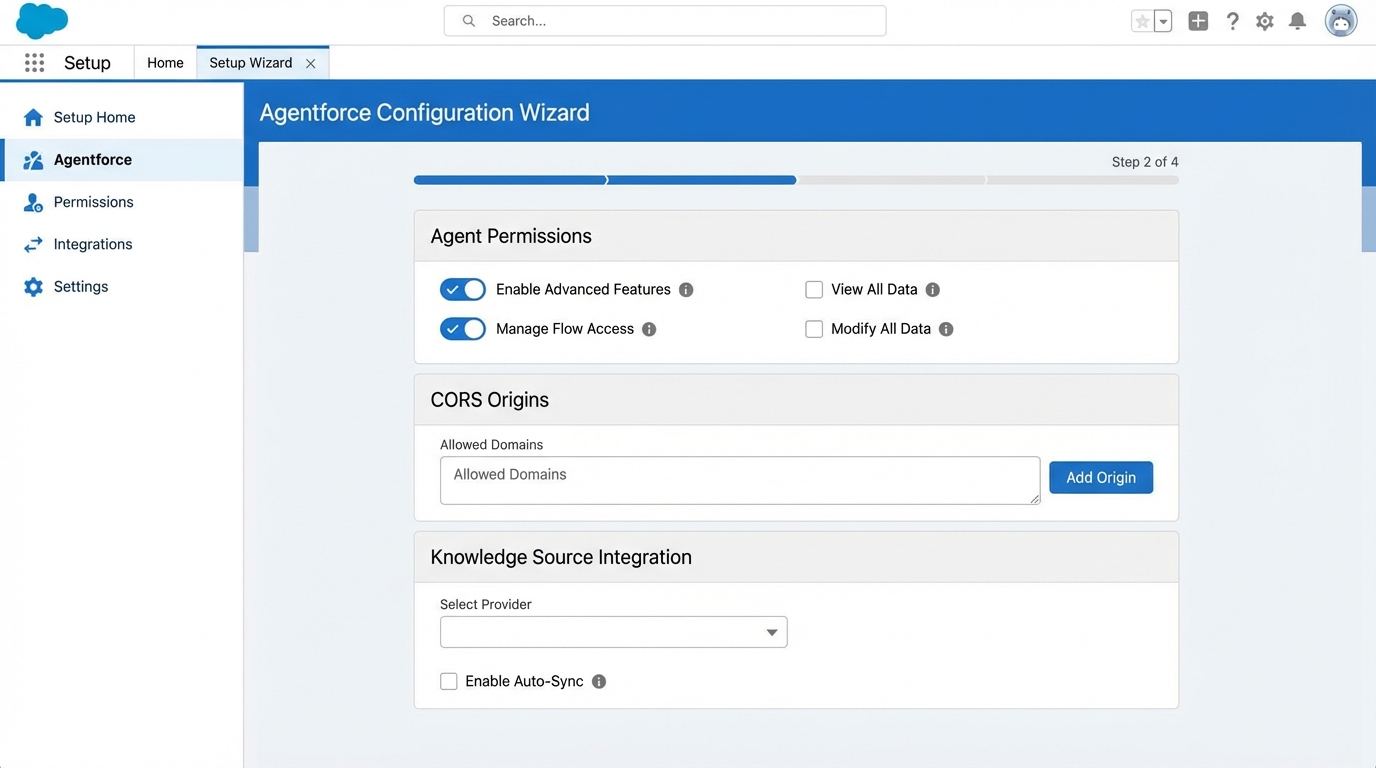
Now, let’s break down the actual work. I’ve found that most people get stuck on permissions or CORS settings, so pay close attention to those parts. If you have your FAQs ready in a structured format, you can honestly get a basic version of this running in about an hour. Here is the path I usually follow.
The configuration checklist
- Create the Service Agent: Start in the Agentforce setup and spin up a new agent specifically for service.
- Sort out Permissions: This is where people trip up. You need to assign the right Permission Sets to your agent users or they won’t be able to do their jobs.
- Messaging and Omni-Channel: You have to enable Messaging in your org and set up your Omni-Channel routing. If you’ve done this for human agents, it’s the same logic.
- Queues and Presence: Create a queue for the agent and set up a Presence Status. Don’t forget the Presence Permission Set so the system knows the agent is “available.”
- Deployment: Create your Messaging Channel and an Embedded Service Deployment. This is what actually “hosts” the chat window on your site.
- Routing Flow: Build an Omni-Channel routing Flow. This tells Salesforce, “Hey, when a chat comes in, send it to the AI agent first.”
- Site Setup: Head over to Digital Experiences and create your site. If you already have one, you’re ahead of the game.
- Security Whitelisting: You must add your site’s URL to the Trusted URLs and configure CORS. If you don’t do this, the chat widget simply won’t show up.
- Test and Refine: Open the site, talk to the agent, and see how it handles your data.
One thing that trips people up is the CORS settings. If your chat widget isn’t appearing on your Experience Cloud site, nine times out of ten, you forgot to whitelist your site’s URL in the Security settings. It’s a small step that causes a lot of headaches.
Practical tips from the field
Here’s the thing: your agent is only as good as the data you give it. I always suggest starting with a small, high-value dataset. Take your top 10 most common support tickets and turn those into clear, structured documents. You might want to look into Agentforce RAG grounding to understand how to better connect your data sources for more accurate responses.
But don’t just “set it and forget it.” You need to monitor the conversation logs. You’ll quickly see where the agent is struggling or where customers are asking things you haven’t covered yet. And always, always have a fallback. If the AI gets stuck, there should be a clear path to transfer the conversation to a human agent. Nothing frustrates a customer more than an AI that’s stuck in a loop.
Key Takeaways
- Agentforce Experience Cloud isn’t just a fancy chatbot; it’s a way to scale your service without hiring more people.
- Permissions and CORS are the most common points of failure during setup.
- Structured data is your best friend – clean docs lead to clean answers.
- Always provide a “human” escape hatch for complex queries.
- Start small, test in a sandbox, and iterate based on real logs.
Setting up an Agentforce Experience Cloud site is a massive win for any admin or dev looking to show real business impact. It moves the needle on CSAT and keeps your support team from burning out on the basics. Once you get the routing and security settings down, you’ll see it’s a pretty repeatable process for any site you manage.