Setting up an Okta Salesforce SSO integration is one of those tasks that sounds intimidating until you’ve actually done it a few times. I’ve spent years helping teams move away from the “sticky note under the keyboard” password strategy, and honestly, SAML 2.0 is the gold standard for getting this right. If you want to stop managing passwords in two different places, you’re in the right spot.
I’ve seen teams struggle with this for days, but it usually comes down to one or two small settings. We’re going to walk through how to get this working without the usual headaches. So, why does this matter? Beyond just making life easier for your users, it’s about centralizing your security. When someone leaves the company, you disable them in Okta, and they’re instantly locked out of Salesforce. That’s a huge win for your security audit.
Setting up your Okta Salesforce SSO configuration
Before you start clicking buttons, you need a few things ready. You’ll need admin rights in both Okta and Salesforce. Also, make sure you have My Domain enabled in your Salesforce org. If you don’t have that set up yet, the SSO won’t have a unique place to land. It’s a hard requirement, so don’t skip it.
Start by logging into Okta. You don’t need to build a custom SAML app from scratch – Okta has a pre-built Salesforce app in their catalog. Use it. It handles a lot of the heavy lifting for you. When you add the app, choose SAML 2.0 as the sign-on method. You’ll get a set of instructions and a certificate. Keep that tab open because you’ll need to copy those values into Salesforce in a second.
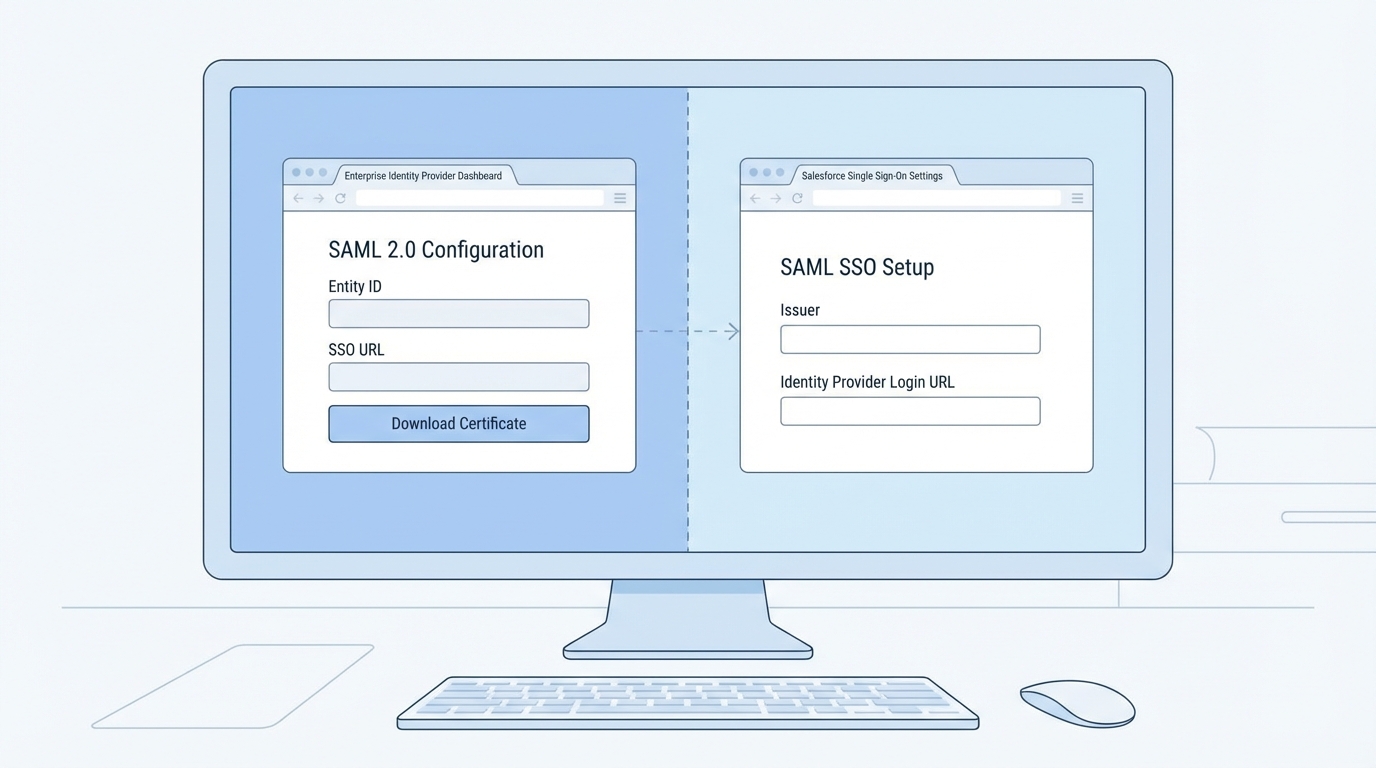
Now, jump over to Salesforce and head to Single Sign-On Settings in the Setup menu. Create a new SAML configuration. This is where you’ll paste the Issuer and the Identity Provider Login URL from Okta. You’ll also need to upload the certificate Okta gave you. Here’s a tip: I always use the Federation ID as the SAML Identity Type. It’s much more stable than using a username, especially if your users change their email addresses often.
Exchanging the metadata
Once you’ve saved your settings in Salesforce, look for the “Download Metadata” button. This file contains the “Source of Truth” for your Salesforce org. You’ll need to take the Login URL and the Logout URL from this file and put them back into the Okta configuration. If you’re planning on using Single Logout (SLO), you’ll also need to create a small .crt file from the Salesforce metadata. I’ve seen people get frustrated here, but it’s just a matter of wrapping the certificate string in the standard BEGIN and END lines.
One thing that trips people up is the Entity ID. In Salesforce, it usually defaults to https://saml.salesforce.com. Make sure this matches exactly in Okta. If one side has a trailing slash and the other doesn’t, the whole thing will break.
If you’re worried about the security of these connections, you might also want to look into using the TwoFactorMethodsInfo object to track how your users are actually logging in once SSO is live.
Troubleshooting your Okta Salesforce SSO integration
So, you’ve connected the two systems, but it’s still not working. Don’t panic. The first place I always look is the SAML Validator in Salesforce. It’s buried in the SSO settings page. It will tell you exactly why an assertion failed. Usually, it’s a mismatched Federation ID or a certificate that hasn’t been activated yet.
Another common issue is user assignment. You can have the most perfect technical setup in the world, but if the user hasn’t been assigned to the Salesforce app inside Okta, they’re going nowhere. Double-check the “Assignments” tab in Okta. Also, make sure you’ve added Okta as an Authentication Service in your Salesforce My Domain settings. If you don’t check that box, the “Login with Okta” button won’t even show up on your login page.
I’ve found that choosing the right sandbox type for testing this is vital. Don’t try to build your first Okta Salesforce SSO flow in production. Use a partial or full sandbox so you have real user data to test with. It makes the mapping process much easier to verify.
Key Takeaways for a Smooth Rollout
- Use Federation IDs: Avoid using email addresses as the link between systems. Emails change; IDs don’t.
- Mind the URLs: ACS and Entity ID values are case-sensitive. Copy and paste them; don’t type them out.
- Test Single Logout: Most people forget this. Make sure users are actually logged out of both systems when they click “Logout.”
- Check My Domain: Ensure Okta is enabled as an auth provider in your My Domain configuration.
- Keep your certs safe: Store your metadata and certificates in a secure place. You’ll need them again when it’s time to rotate certificates.
Getting your Okta Salesforce SSO running is a huge step toward a more professional, secure environment. It takes away the friction of daily logins and lets your team focus on actual work. Just take it step by step, watch your metadata values, and always test in a sandbox first. If you hit a wall, the Salesforce debug logs and the Okta System Log are your best friends. Good luck with the setup!