
Why you actually need Salesforce Remote Site Settings
If you've ever tried to run an Apex callout and got hit with that "Unauthorized endpoint" error, you've already met the gatekeeper. Salesforce Remote Site Settings are the platform's way of making sure your code isn't talking to random, untrusted servers. By default, Salesforce is a walled garden. It won't let any outbound request leave the building unless you've explicitly put the destination on the guest list.
I've seen plenty of developers get frustrated by this, especially when they're rushing to test a new API. But here's the thing: it's a vital security layer. Without it, a malicious piece of code could quietly send your sensitive data to any server on the internet. Whether you are dealing with SOAP vs REST, the rule is the same - no entry without a setting.
How the security check works
When your code hits http.send(req), the platform looks at the URL in your request. It then checks your Salesforce Remote Site Settings to see if that specific domain is authorized. If it's not there, the request is killed instantly. It doesn't matter if your code is perfect or your credentials are valid; if the door is locked at the network level, you aren't getting out.
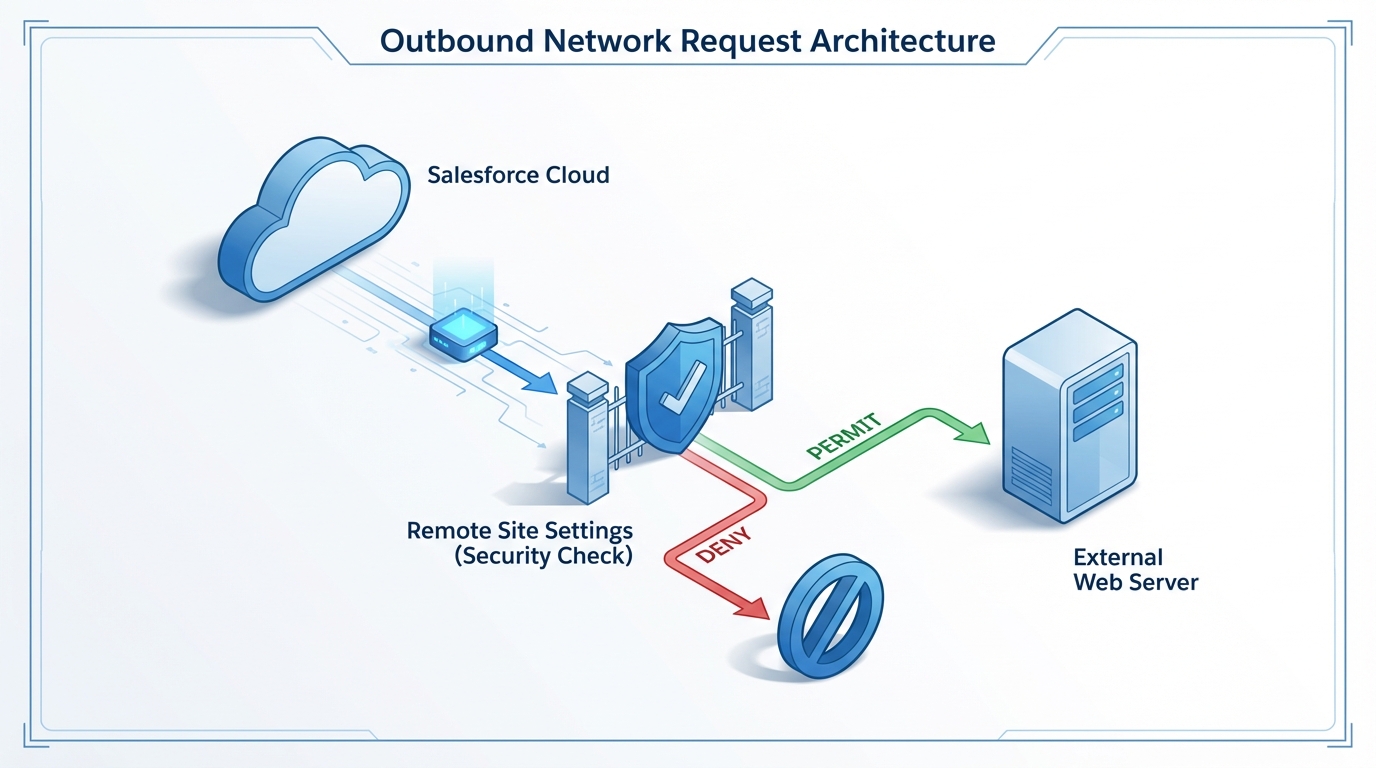
A technical architecture diagram showing the security handshake between Salesforce and an external domain through Remote Site Settings.
Setting up Salesforce Remote Site Settings the right way
Adding a new entry is pretty straightforward, but there are a few spots where people trip up. You'll find the menu under Setup by searching for "Remote Site Settings" in the Quick Find box. When you click "New Remote Site," you only need a couple of things: a name and the URL.
- Remote Site Name: Use something descriptive. Don't just call it "Test." If it's for the Stripe API, call it "Stripe_API."
- Remote Site URL: This is just the protocol and the domain (like https://api.stripe.com). You don't need the full path to the specific endpoint.
- Active: Make sure this box is checked, or the whole thing is useless.
One thing that trips people up is the difference between a domain and a path. If you're hitting https://api.example.com/v1/users, you only need to add https://api.example.com to your Salesforce Remote Site Settings. You don't need a separate entry for every single sub-page or folder on that server.
Pro tip: Always use HTTPS. Salesforce will let you add an HTTP site, but in a real-world production environment, sending data over an unencrypted connection is just asking for trouble. Most modern APIs won't even talk to you over standard HTTP anyway.
Salesforce Remote Site Settings vs Named Credentials
Now, this is where it gets interesting. A lot of teams I work with are moving away from basic remote site entries in favor of Named Credentials. So what's the difference? Look at it this way: a Remote Site Setting is just a whitelist. It says "You are allowed to talk to this server," but it doesn't help you with the actual conversation.
Named Credentials do the whitelisting work AND handle the authentication. Instead of hard-coding your API keys or managing OAuth tokens in your Apex logic, you let the platform handle it. If you're building a complex Salesforce API integration, Named Credentials are usually the better choice because they're more secure and easier to maintain across different sandboxes.
When should you stick with a Remote Site Setting?
So why would you ever use the old way? Sometimes you're hitting a public API that doesn't require any authentication at all - like a currency exchange rate service or a zip code lookup. In those cases, setting up a full Named Credential is overkill. A simple Salesforce Remote Site Settings entry is all you need to get the job done quickly.
Common pitfalls and limitations
I've spent hours debugging callouts only to realize I made a typo in the URL. It happens to the best of us. But there's another limitation that catches people off guard: these settings only apply to server-side callouts (Apex). If you're trying to make a call from a Lightning Web Component using JavaScript, you're looking at a different beast entirely.
For client-side requests, you need to look at CSP Trusted Sites or CORS settings. I've seen teams add a domain to Salesforce Remote Site Settings and then wonder why their LWC is still throwing errors. Just remember: Apex uses Remote Site Settings; the browser uses CSP. They are not interchangeable.
Key Takeaways
- Salesforce Remote Site Settings are mandatory for any outbound Apex callout to an external URL.
- You only need to whitelist the base domain (e.g., https://api.github.com), not every specific endpoint path.
- Use Named Credentials instead if you need to handle authentication like OAuth or API keys securely.
- These settings do not affect Lightning Web Components; those require CSP Trusted Sites.
- Keep your entries specific - don't use wildcards unless you absolutely have to.
At the end of the day, managing these settings is a routine part of any dev's life. Just keep your list clean and document why each site was added. It makes life much easier when you're doing a security audit or migrating to a new org. If you're starting a new project today, check if a Named Credential fits your needs first - but if not, now you know exactly how to handle the whitelist.


Leave a Comment