
If you've spent any time in Setup, you've probably run into the Salesforce field dependency. It's one of those bread-and-butter features that makes the user interface feel a lot smarter without needing a single line of code. Look, nobody wants to scroll through a list of 50 states when they've already selected "United Kingdom" as their country. It's annoying for the user and it's a nightmare for your data quality.
So, what does this actually mean? Basically, you're telling Salesforce to hide or show certain picklist values based on what someone picked in a different field. I've seen teams try to solve this with complex code, but honestly, you should always try this declarative approach first. It's easier to maintain and much faster to build.
Setting up your first Salesforce field dependency
Every Salesforce field dependency has two main players: the controlling field and the dependent field. Think of the controlling field as the boss. It decides what the dependent field is allowed to show. In my experience, the controlling field is usually a picklist or a checkbox, while the dependent field is almost always a picklist.
Here's a quick breakdown of how they interact:
- Controlling Field: This is the trigger. If it's a checkbox, "Checked" shows one set of values and "Unchecked" shows another.
- Dependent Field: This field reacts. It filters its list of options based on what happened in the boss field.
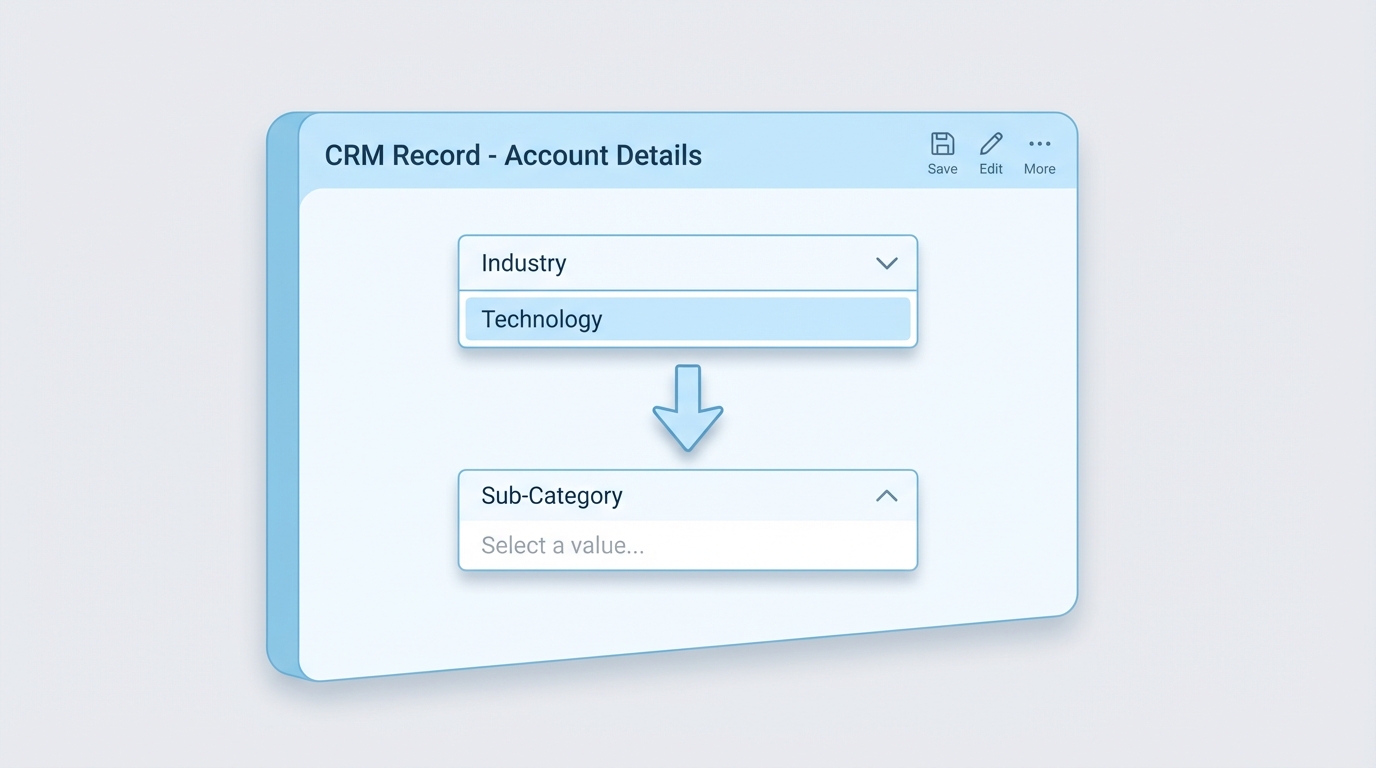
A professional UI diagram illustrating the relationship between a controlling field and a dependent field in a CRM interface.
Common use cases I see in the wild
I've used these in almost every org I've worked in. The most common one is definitely Country and State, but it goes way beyond that. You might use it for a "Reason Lost" field on an Opportunity that only shows up if the Stage is set to "Closed Lost". Or maybe a "Sub-Category" field that changes based on a high-level "Issue Type" on a Case.
But here's a tip: don't go overboard. I once saw an org with five levels of nested dependencies. It was a mess to manage. If you find yourself building a massive web of logic, you might want to look at Salesforce Dynamic Forms vs Record Types to see if there's a cleaner way to handle the UI.
How to build it in the UI
The process is pretty straightforward. You'll head into the Object Manager for whatever object you're working on. Under "Fields & Relationships," you'll see a button for Field Dependencies. Once you click "New," you just pick your two fields and get to work on the matrix.
The matrix is where you highlight the values you want to include. It's a bit click-heavy, but it's visual and hard to mess up. Just remember to hold down the Ctrl or Cmd key to select multiple values at once. It'll save you a lot of time.
Pro Tip: Always test your dependencies as a specific user profile. Sometimes a field is hidden by Field Level Security, and it can make your dependency look like it's broken when it's actually just a permissions issue.
When a Salesforce field dependency isn't enough
Now, here's the thing. As great as a Salesforce field dependency is, it has its limits. For example, you can't use a multi-select picklist as a controlling field. And if you need to enforce these rules on the server side (like for API imports), a dependency won't always stop bad data from coming in. That's when you'll need to back it up with a Salesforce validation rule to make sure the data stays clean.
You also need to keep Record Types in mind. If a picklist value isn't included in a Record Type, it won't show up in your dependency matrix either. It's a common trap that trips people up during deployment. Always double-check that your picklist values are assigned to the right Record Types before you start mapping the dependency.
Example Mapping Logic
If you were to look at the logic behind the scenes, it looks something like this simple table. It's just a map of what's allowed where.
| Controlling Value (Country) | Allowed Dependent Values (States/Provinces) |
|---|---|
| USA | California, Texas, New York |
| Canada | Ontario, Quebec, British Columbia |
| Australia | New South Wales, Queensland, Victoria |
Key Takeaways
- A Salesforce field dependency is a great way to clean up a cluttered UI.
- The controlling field drives the logic, and the dependent field reacts.
- Checkboxes can be controlling fields, which is super handy for "Other" fields.
- Always verify your Record Type settings so values don't go missing.
- Use validation rules if you need to enforce these choices during data imports.
Mastering the Salesforce field dependency is a quick win for any admin or dev. It makes the lives of your users easier and keeps your data from turning into a total disaster. Just keep the mappings simple, document your logic, and always test in a sandbox first. If the logic gets too complex for a matrix, that's your cue to start looking at Flow or custom components.


Leave a Comment