
We've all been there. You build a critical field to track a high-risk account status, but users just scroll right past it. If you've been looking for a way to surface a Salesforce notification banner without writing a ton of custom code every time, I've got something for you. In my experience, the best solutions are the ones that give admins control without needing a developer for every tiny change.
Why You Need a Configurable Salesforce Notification Banner
Salesforce is great at storing data, but it's not always great at shouting about it. Users are busy. They're clicking through records fast, and a small checkbox or picklist value is easy to miss. That's where AlertFlow comes in. It's a tool I've seen work well because it puts a bright, SLDS-styled banner right where people can't ignore it.
Maybe you need to flag a sanctioned account, a credit hold, or just remind everyone about scheduled maintenance. Instead of building a custom Lightning Web Component for every single scenario, you can use this one system to handle all of them. It's about making sure the right people see the right info at the right time.
How the System Actually Works
Under the hood, this thing is pretty lean. It uses Custom Metadata Types to drive the logic, which means you don't have to worry about deployments every time you want to add a new alert. There's an Apex service layer that does the heavy lifting, evaluating your rules and figuring out if a banner should show up. If you're curious about the technical side of things, you might want to look into when to use Apex over Flow for these types of utility services.
- Notification Rules: This is where you define your message, the severity (like Error or Success), and the logic for when it appears.
- Object Config: This handles the parent-child relationships. It's how you make an Account-level alert show up on a related Contact or Opportunity.
- Utility Bar Component: The LWC lives in your utility bar and injects the banner into the page. It's clean, simple, and stays out of the way until it's needed.
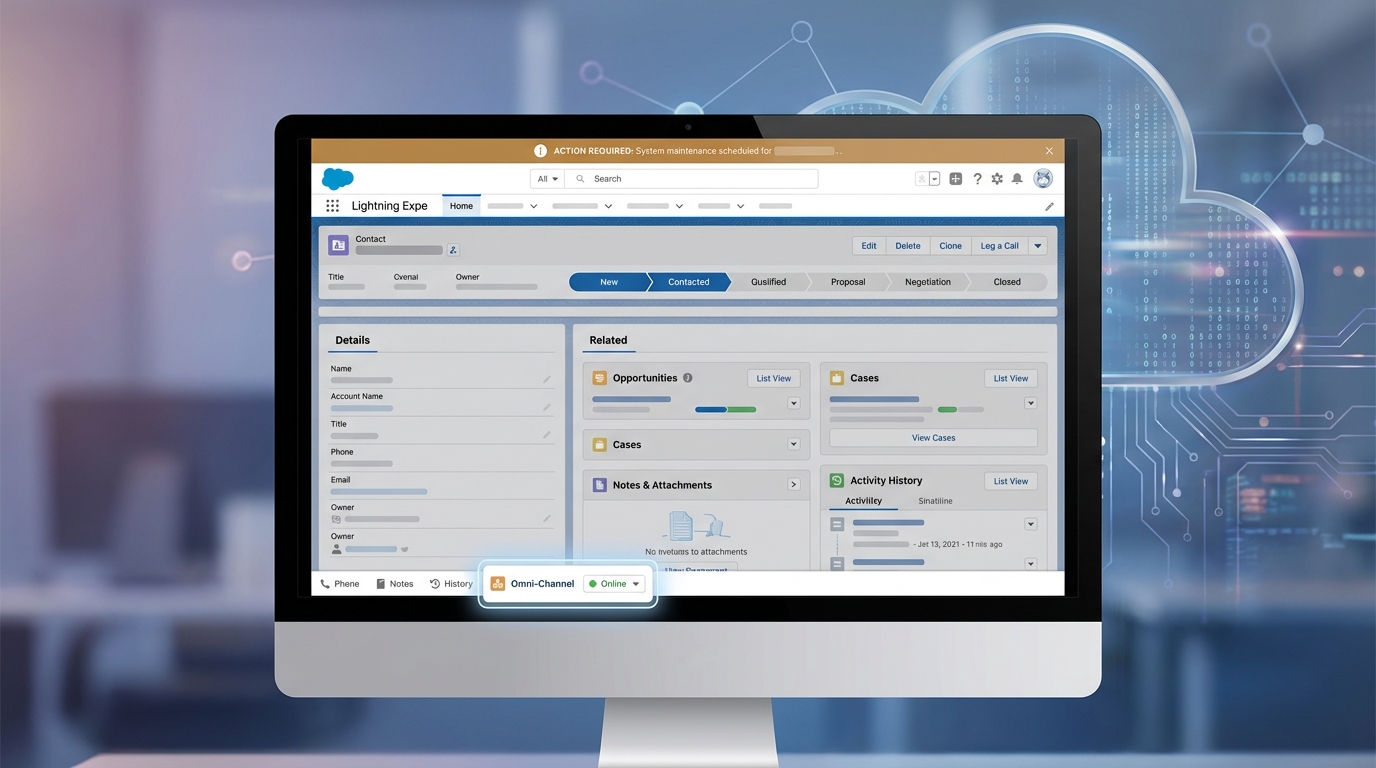
A realistic mockup of a Salesforce record page showing a configurable notification banner at the top and an active utility bar component.
Setting Up Your Salesforce Notification Banner System
You can get this running in about five minutes. I'm not kidding. First, you'll need to install the package using the links below. I usually recommend installing for all users so you don't run into permission headaches later on.
- Production / Developer: Install Link
- Sandbox: Install Link
Once it's installed, you have to add it to your app. Go to the App Manager, edit your Lightning App, and head to the Utility Items section. Add the "Notification Banner" component. Set the Panel Height to 1 and make sure "Start automatically" is checked. That last part is key. If you don't check it, the banner won't load until someone clicks the utility bar, which defeats the whole purpose.
One thing that trips people up: always test your banners in a sandbox first. Even though it's metadata-driven, you want to make sure your field merge syntax is spot on before your users start seeing weird brackets in their alerts.
Creating Your First Rule
Let's say you want to flag sanctioned accounts. You'd go into Custom Metadata Types and create a new Notification Rule. Give it a title like "Sanctioned Account" and a message like "{!Account.Name} is under sanctions." You can set the severity to "Error" so it shows up in red. It's a lot like setting up criteria in a Flow, and if you follow Best practices for Salesforce Flow, you'll find the logic here very familiar.
Handling Child Records and Hierarchies
One of the coolest parts of this Salesforce notification banner is the hierarchical feature. Honestly, most teams get this wrong by trying to recreate the same alert on every object. With AlertFlow, you can set a rule on the Account and check the "Show On Children" box. Now, that same "Sanctioned Account" warning will follow the user to any related Contact or Opportunity.
But how does it know which records are related? That's what the Object Config is for. The package comes with standard ones like Contact to Account, but you can add your own custom objects too. You just tell the system which lookup field to follow. It saves you from having to manage 50 different rules for the same message.
Dynamic Messages with Merge Fields
Static messages are okay, but dynamic ones are better. You can use merge fields like {!Account.Owner.Name} or {!Opportunity.Amount} to make the alerts feel more personal and useful. You can even add action links. If an account is on credit hold, why not add a link directly to the Finance team's Chatter group or a specific internal process page?
Key Takeaways
- No-code management: Once the LWC is in the utility bar, admins manage everything through Custom Metadata.
- Visibility: Using a Salesforce notification banner ensures critical flags aren't buried at the bottom of a record page.
- Hierarchical alerts: Set a rule once on a parent record and let it flow down to child records automatically.
- Scheduling: You can set start and end dates for banners, which is perfect for temporary alerts like office closures or system maintenance.
So, what's next? If you're tired of users saying "I didn't see that field," give this a try. It's a practical way to handle communication inside the CRM without cluttering up your page layouts with extra fields or massive text blocks. Just install the package, set your first rule, and see how much easier it is to keep your team informed.
If you run into issues, double-check that your rule is marked as "Active" and that your date ranges are correct. It's usually the simple things that get us. Now go build some alerts that actually get noticed.


Leave a Comment