
Ever had a user complain that the standard number input in a Screen Flow feels clunky? I get it. Sometimes a simple Salesforce Flow Counter LWC is exactly what is needed to make a screen feel like a modern app instead of a database form. It is one of those small UX wins that makes people actually enjoy using the tools we build.
In my experience, users hate typing if they do not have to. If they are out in a warehouse or on a retail floor, they want big, clickable buttons. This guide shows you how to build a reusable counter component that you can drop into any flow to let users tap their way to the right number.
Why you need a Salesforce Flow Counter LWC for better UX
Look, the standard number field in a flow works, but it is boring. It does not provide that tactile feedback users expect. When I first worked with inventory management apps, I realized that store managers were constantly fat-fingering numbers on their mobile devices. A plus-minus counter solves that problem immediately.
By using a custom Salesforce Flow Counter LWC, you are giving them a clean interface for inventory adjustments, quantity selections, or even simple numeric scores. It reduces errors because they can see the value change in real-time without clicking into a tiny text box. Plus, it is completely reusable across different objects and flows.
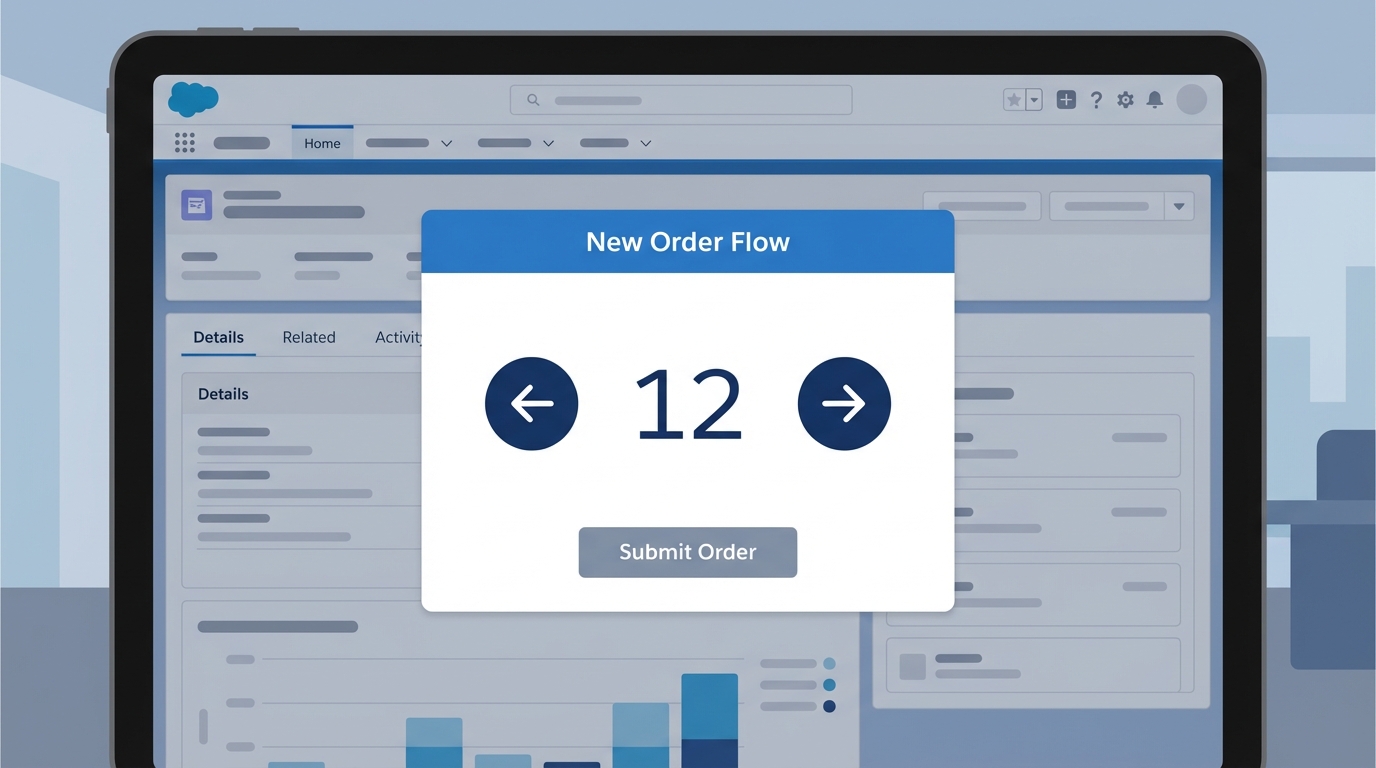
A high-quality UI mockup of a Salesforce Screen Flow displaying a custom numeric counter component with increment and decrement buttons.
Step 1: Prep your custom field
Before we touch any code, you need a place to store the data. For this example, we will use the Product object. Go ahead and create a Number field on Product2. I usually call it "Current Inventory" or something similar. Set it to 3 digits with no decimals. Don't forget to check your field-level security so the users running the flow can actually see and edit it.
Step 2: Building the Salesforce Flow Counter LWC
Now for the fun part. We are going to build the component. This LWC needs to do three things: show a label, handle button clicks to change the value, and tell the Flow when that value changes. If you are new to this, you might want to read up on LWC component communication to understand how data moves between elements.
screenCounterComponent.html
<template>
    <div class="slds-form-element">
        <label class="slds-form-element__label">{label}</label>
        <div class="slds-form-element__control">
            <div class="slds-grid slds-grid_vertical-align-center">
                <button class="slds-button slds-button_icon slds-button_icon-border"
                        onclick={decrementCounter}>
                    <lightning-icon icon-name="utility:dash" size="small" class="decrement-color"></lightning-icon>
                </button>
                <input type="number"
                       class="slds-input slds-m-horizontal_small slds-text-align_center"
                       value={counterValue}
                       onchange={handleInputChange} />
                <button class="slds-button slds-button_icon slds-button_icon-border"
                        onclick={incrementCounter}>
                    <lightning-icon icon-name="utility:add" size="small" class="increment-color"></lightning-icon>
                </button>
            </div>
        </div>
    </div>
</template>
screenCounterComponent.css
.increment-color { - sds-c-icon-color-foreground-default: #2e844a;
}
.decrement-color { - sds-c-icon-color-foreground-default: #ea001e;
}
input::-webkit-outer-spin-button,
input::-webkit-inner-spin-button {
    -webkit-appearance: none;
    margin: 0;
}
screenCounterComponent.js
Here is where we handle the logic. We use the @api decorator to let the Flow talk to our component. When the value changes, we dispatch a "change" event. This is how the Flow knows what the new number is.
import { LightningElement, api, track } from 'lwc';

export default class ScreenCounterComponent extends LightningElement {
    @api label;
    @api defaultValue = 0;
    @api value;

    @track counterValue;

    connectedCallback() {
        this.counterValue = this.defaultValue;
    }

    incrementCounter() {
        this.counterValue++;
        this.updateFlowValue();
    }

    decrementCounter() {
        if (this.counterValue > 0) {
            this.counterValue - ;
            this.updateFlowValue();
        }
    }

    handleInputChange(event) {
        this.counterValue = parseInt(event.target.value, 10) || 0;
        this.updateFlowValue();
    }

    updateFlowValue() {
        this.value = this.counterValue;
        this.dispatchEvent(new CustomEvent('change'));
    }
}
screenCounterComponent.js-meta.xml
This part is critical. If you don't set the target to lightning__FlowScreen, you won't see your component in the Flow builder. We also define our inputs and outputs here.
<?xml version="1.0" encoding="UTF-8"?>
<LightningComponentBundle xmlns="http://soap.sforce.com/2006/04/metadata">
    <apiVersion>61.0</apiVersion>
    <isExposed>true</isExposed>
    <targets>
        <target>lightning__FlowScreen</target>
    </targets>
    <targetConfigs>
        <targetConfig targets="lightning__FlowScreen">
            <property name="label" type="String" label="Label" />
            <property name="defaultValue" type="Integer" label="Starting Value" />
            <property name="value" type="Integer" label="Output Value" role="outputOnly" />
        </targetConfig>
    </targetConfigs>
</LightningComponentBundle>
Wiring the Salesforce Flow Counter LWC into your Flow
Now that the code is deployed, it is time to use it. Open up the Flow Builder and create a new Screen Flow. You'll want to start by creating a variable called recordId (Available for Input) so the flow knows which product it is looking at.
- Get Records: Fetch the Product record where the Id matches your
recordIdvariable. - Screen Element: Drag your new "LWC Counter Component" onto the screen. Set the "Label" to something like "Adjust Stock" and map the "Starting Value" to the current inventory field from your Get Records element.
- Update Records: Use the output value from the LWC to update the Product record.
Pro tip: Always make sure your
recordIdvariable is spelled exactly like that-lowercase "r" and uppercase "I". If you get it wrong, the Quick Action won't pass the ID automatically, and you will be left scratching your head wondering why the flow is blank.
If you enjoy building custom UI like this, you might also like my tutorial on how to build a reusable Salesforce Flow progress bar with LWC. It uses similar logic to keep users engaged during long processes.
Key Takeaways
- A Salesforce Flow Counter LWC improves mobile usability by replacing small text inputs with large, clickable buttons.
- The
@apidecorator is your best friend for passing data between the Flow and your LWC. - Always include a "change" event in your JS so the Flow engine knows the value has been updated before the user clicks "Next".
- CSS custom properties (SLDS hooks) are the easiest way to color your icons without writing complex styles.
Wrap up
So, what does this actually mean for your org? It means fewer support tickets about "bad data" and a much happier user base. Building a Salesforce Flow Counter LWC isn't just about making things look pretty; it's about making the system work for the people using it every day. Give this a try in your sandbox and see how much faster your users can get through their tasks. Once you start adding custom LWCs to your flows, you'll never want to go back to the standard components again.


Leave a Comment