
Look, if you're building on the platform, you've got to get comfortable with LWC data binding. It's the foundation of how your components stay reactive and keep the UI updated without you having to manually touch the DOM every five seconds. I've seen plenty of projects turn into a maintenance nightmare just because the data flow was a tangled mess of spaghetti code.
So, what does it actually mean? At its simplest, it's just connecting your JavaScript properties to your HTML template. When the property changes, the UI follows. But there's a right way and a wrong way to handle this if you want your components to stay fast and readable.
Understanding LWC Data Binding: The Data Down Pattern
The standard way we move data in Salesforce is "Data Down." This means a parent component holds the "source of truth" and passes it to children. To make this work, you use the @api decorator. This marks a property as public, so the parent can see it and push data into it.
<! - parentComponent.html - >
// parentComponent.js import { LightningElement } from 'lwc'; export default class ParentComponent extends LightningElement { greeting = 'Hey there, team!'; }
<! - childComponent.html - >
{message}
// childComponent.js import { LightningElement, api } from 'lwc'; export default class ChildComponent extends LightningElement { @api message; }
I've seen teams try to bypass this by using querySelectors to grab child elements and set values manually. Don't do that. It breaks the reactive nature of the framework and makes debugging a total headache. Stick to the properties.
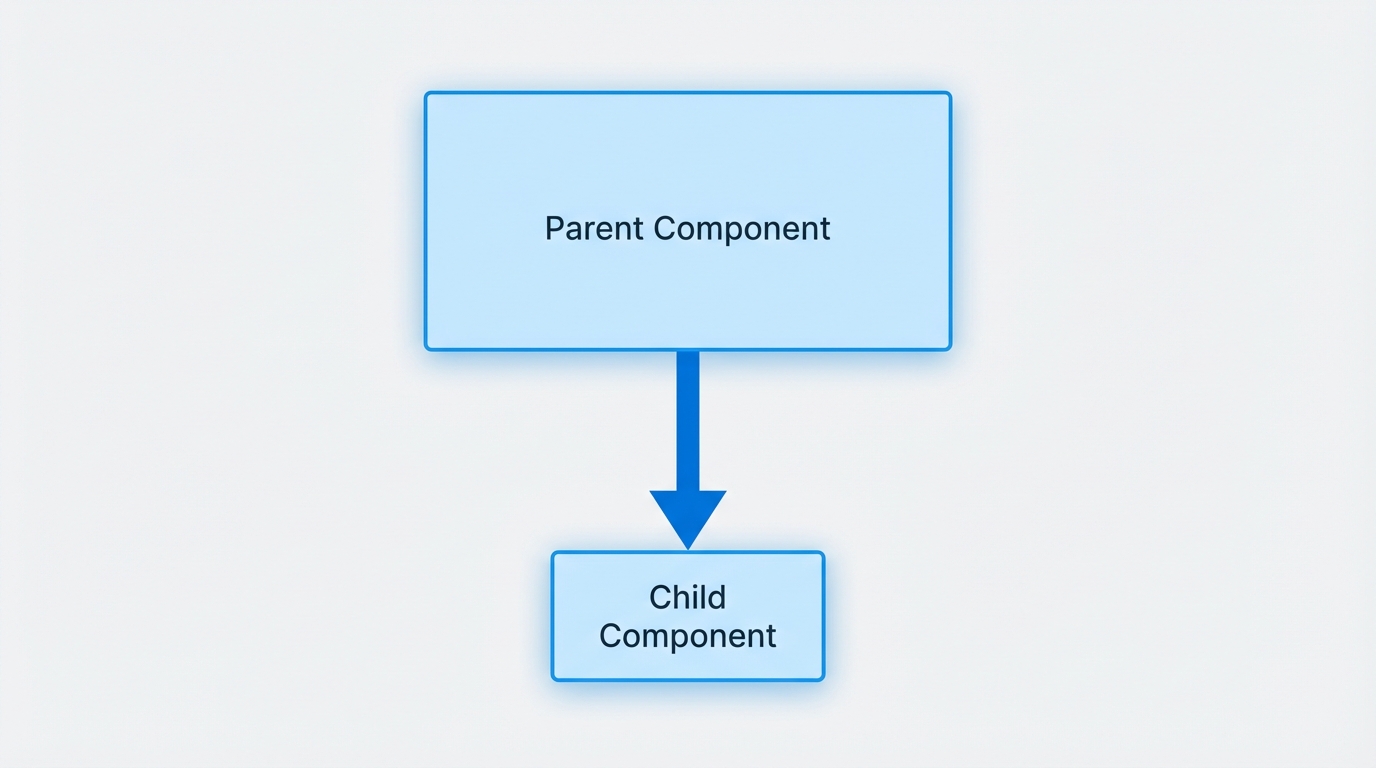
A technical architecture diagram showing a structured one-way data flow from a parent component to a child component.
Two-Way LWC Data Binding: Handling User Input
Here's a common point of confusion: LWC doesn't actually have "true" two-way binding like you might see in older frameworks. It's more of a loop. Data goes down to the child, and if the child changes something, it sends an event back up to the parent. The parent then updates the state, and the cycle repeats.
This is a core part of LWC component communication. If you're building a form, you'll use an onchange handler to capture what the user is typing and update your JS variables.
<! - childComponent.html - >
// childComponent.js handleChange(event) { const newText = event.target.value; this.dispatchEvent(new CustomEvent('messagechange', { detail: { value: newText } })); }
The parent listens for that onmessagechange event and updates the original property. It feels like two-way binding to the user, but under the hood, you have total control over how that data changes.
Expressions and Logic in Templates
Sometimes you need to show data in a specific format, like making a string uppercase or checking a list length. While you can do some basic logic in the HTML, keep it light. If you find yourself writing complex logic inside curly braces, it's time to move that to a getter function in your JavaScript file.
By the way, if you haven't seen the latest updates, there are some pretty cool changes to LWC expressions coming in the Spring 26 release that make this even more flexible. It's definitely worth checking out if you want to write cleaner templates.
Best Practices for LWC Data Binding
Honestly, most teams get this wrong by overusing @track. Since Spring 20, LWC is much smarter about reactivity. You usually don't need @track for simple properties anymore-only when you're modifying internal parts of an object or an array. Here are a few rules I live by:
- Keep it flat: Avoid deep, nested objects. They're a pain to update and can lead to weird rendering bugs where the UI doesn't refresh when you expect it to.
- Use Getters: Instead of calculating values in the template, use a
getfunction. It makes your code much easier to read. - Immutability matters: When you update an object or array, don't just change a property. Create a new copy using the spread operator
{...obj}. This tells LWC "Hey, something changed!" so it can re-render correctly.
Pro tip: If your component is getting so big that the LWC data binding logic is hard to follow, it's a sign you should break it into smaller sub-components. Small components are easier to test and much faster to load.
Key Takeaways
- Data flows down via
@apiproperties; events flow up viaCustomEvent. - LWC is reactive by default for simple properties, so use
@tracksparingly. - Always use the spread operator for objects and arrays to ensure the UI updates.
- Move complex UI logic into JS getters to keep your HTML clean.
Look, mastering LWC data binding isn't about memorizing every directive. It's about understanding the "Data Down, Events Up" flow. Once that clicks, you'll stop fighting the framework and start building components that actually work the way they're supposed to. If you're coming from a background of jQuery or even older Aura components, this might feel a bit restrictive at first, but the performance gains and the lack of bugs make it totally worth it. Happy coding.


Leave a Comment