
Why your project needs a Salesforce trigger class
If you've spent any time looking at messy Apex code, you've probably realized that a Salesforce trigger class is a total lifesaver. It's the gold standard for organizing your logic so you don't end up with a thousand-line trigger file that nobody wants to touch. In my experience, skipping this step is the fastest way to create technical debt that'll haunt you for years.
So, what are we actually talking about? A Salesforce trigger class - often called a handler - is just a regular Apex class where you put all your business rules. Instead of writing code directly inside the trigger, you call methods from this class. It sounds like an extra step, but it makes your life so much easier when things get complex.
Why we stop putting logic in triggers
I've seen teams try to "keep it simple" by putting everything in the trigger. But then they need to reuse that logic in a Batch job or a REST API, and they're stuck. By using a handler class, you make your code reusable. You can call that calculateTax() method from anywhere, not just when a record is saved.
Plus, there's the testing side of things. It's a pain to test triggers because you have to insert records every single time to see if your logic works. With a class, you can often test specific methods in isolation, which makes your unit tests run faster and feel a lot less clunky.
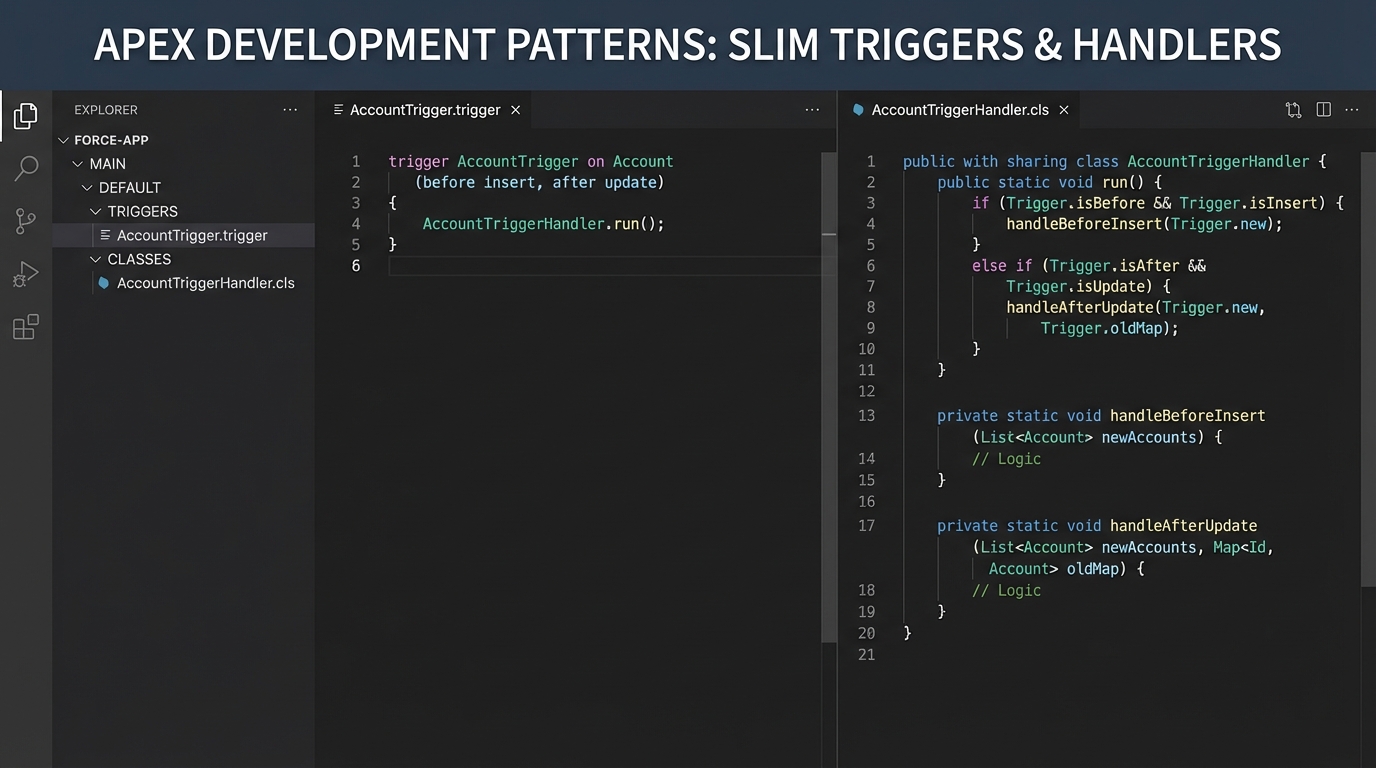
A side-by-side code editor view showing a minimal Salesforce trigger delegating logic to a structured Apex handler class.
How to build a basic Salesforce trigger class
The most common pattern is what I call the "Slim Trigger." The trigger itself doesn't do any heavy lifting. It just checks the context - like if we're in a "before insert" or "after update" state - and then hands the work off to the Salesforce trigger class. Here's how that looks in the real world.
trigger AccountTrigger on Account (before insert, before update) {
    AccountTriggerHandler handler = new AccountTriggerHandler();

    if (Trigger.isBefore) {
        if (Trigger.isInsert) {
            handler.handleBeforeInsert(Trigger.new);
        }
        if (Trigger.isUpdate) {
            handler.handleBeforeUpdate(Trigger.new, Trigger.oldMap);
        }
    }
}
Now, the actual handler class is where the magic happens. Look at how clean this feels when you separate the logic. If you're still debating when to use code over automation, this level of organization is a huge argument for Apex.
public with sharing class AccountTriggerHandler {
    public void handleBeforeInsert(List<Account> newAccounts) {
        for (Account acc : newAccounts) {
            // Simple logic: default the industry if it's blank
            if (String.isBlank(acc.Industry)) {
                acc.Industry = 'Technology';
            }
        }
    }

    public void handleBeforeUpdate(List<Account> newAccounts, Map<Id, Account> oldMap) {
        for (Account acc : newAccounts) {
            Account oldAcc = oldMap.get(acc.Id);
            // Only do something if the revenue changed
            if (acc.AnnualRevenue != oldAcc.AnnualRevenue) {
                // Logic goes here
            }
        }
    }
}
One thing that trips people up
Recursion is the silent killer in Salesforce. If your trigger updates a record, which then fires the same trigger again, you'll hit a limit faster than you can blink. Most pros use a simple static boolean variable in their handler class to prevent this. It's a quick fix that saves you from a lot of "Maximum stack depth reached" errors.
Pro Tip: Never put a SOQL query or a DML statement inside a loop in your handler. It's the number one way to break your org during a bulk data load. Always collect your IDs first and run the query once.
Best practices for your Salesforce trigger class
Here's the thing: everyone has their own favorite framework, but the basics stay the same. If you follow these rules, you'll be ahead of 90% of the developers out there.
- One trigger per object: Don't create five different triggers on the Account object. It makes the order of execution impossible to predict.
- Keep the trigger slim: The trigger file should only be a few lines long. If there's a "for loop" in your trigger file, you're doing it wrong.
- Bulkify everything: Always assume you're processing 200 records at once. Even if you think it'll only ever be one record, someone will eventually use the Data Loader and break your code.
- Use "with sharing": Be intentional about security. Using a class allows you to explicitly define whether you want to respect the user's permissions or run in system mode.
If you're prepping for a job search, you'll definitely see this come up in Apex trigger interview questions. Interviewers love to ask why we use handlers instead of putting code in the trigger, so be ready to talk about maintainability and testing.
Key Takeaways
- A Salesforce trigger class separates the "when" (the trigger) from the "what" (the logic).
- Using handlers makes your code easier to test and much easier to reuse in other parts of the system.
- Bulkification is mandatory - never put queries or DML inside loops.
- Recursion control is essential to prevent your triggers from firing in an infinite loop.
At the end of the day, using a Salesforce trigger class is about making your life easier in six months. When a bug pops up or a client wants a new feature, you'll be glad you don't have to dig through a messy, unorganized trigger file. Start moving your logic into handlers now, and your future self will thank you.


Leave a Comment