
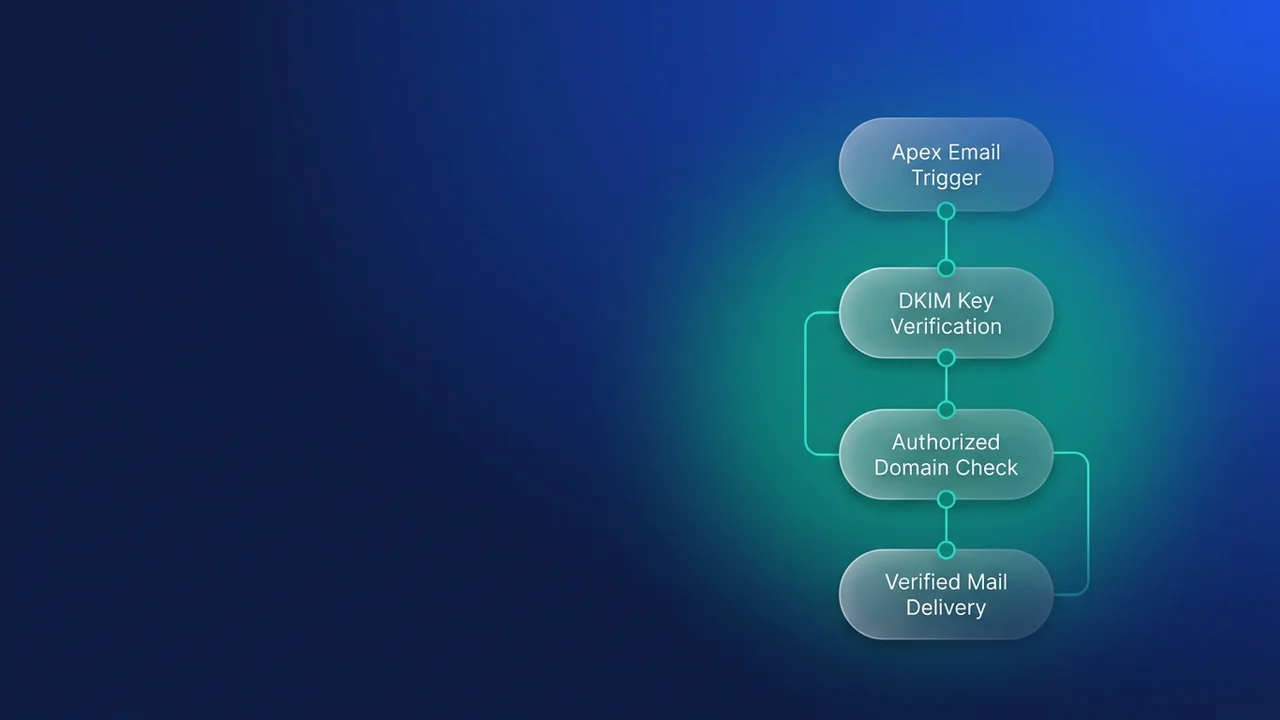

How Salesforce email domain verification works
Salesforce is enforcing stricter controls on email sent from its platform, and any custom domain used in a From: address now has to be verified as yours. The change follows what major email providers such as Gmail and Yahoo are doing with sender authentication (SPF, DKIM, DMARC) to reduce phishing and email spoofing.
After the enforcement dates, messages sent from an unverified custom domain fail to deliver, whether they came from the standard email composer, Apex, Flows, or Email Alerts.
Scope of impact
Verification applies to the domain portion (@yourcompany.com) of any email address Salesforce uses to send outbound messages. Public domains such as gmail.com or outlook.com are exempt.
Automated email is caught by this too:
- Emails triggered via Apex methods (e.g.,
Messaging.sendEmail). - Emails dispatched through Salesforce Flow Email Alerts or Send Email actions.
- System-generated notifications relying on organizational sending addresses.
Integrations using external SMTP services, and emails sent via direct integrations with Office 365 or Gmail accounts (such as those used by Einstein Activity Capture), are generally outside this platform requirement.
Identifying non-compliance
When email from unverified domains stops arriving, check the Email Logs in Setup for the rejection string that system and automated messages get back:
550 5.7.1 Delivery not authorized, message discarded
Composing an email manually in the UI gives the sender a block message instead: "Not allowed to send from an unauthorized domain."
Verification methods for developers and architects
To satisfy the platform requirement, your organization's domain has to meet one of two conditions: an active DKIM key, or an entry in Authorized Email Domains that has been verified.
Option 1: Implementing DKIM keys (recommended)
DKIM (DomainKeys Identified Mail) adds cryptographic signing to outgoing emails, which is strong proof of origin. It is the preferred method because it improves email authentication overall.
Configuration steps in Setup:
- Go to Setup and open DKIM Keys.
- Click Create New Key.
- Define the parameters:
- Key size: 2048-bit is typically recommended.
- Selector: a unique identifier (max 62 alphanumeric characters or hyphens, and it must start with a letter or number).
- Alternate selector: a second unique string for redundancy.
- Domain: the exact domain to be verified (e.g.,
yourcompany.com). This cannot be modified after saving. - Domain match pattern: typically mirrors the domain entry.
- Save the configuration.
Upon saving, Salesforce generates CNAME records. You must provision these records, including the alternate CNAME, in your external DNS provider (e.g., Route 53, Cloudflare).
Once DNS propagation is confirmed, return to DKIM Keys in Setup and click Activate for the new key.
Option 2: Authorized Email Domains (alternative)
This method verifies domain ownership via a DNS record, without any cryptographic signing.
Configuration steps in Setup:
- Go to Setup and open Authorized Email Domains.
- Click Add and input the custom domain name.
- Save the entry.
Salesforce generates a unique verification key (a string value).
You must provision that key as a TXT record in your domain's external DNS settings. Salesforce provides the specific record format when you save the domain entry.
After the TXT record propagates, return to the domain entry in Authorized Email Domains and enable Verify domain ownership.
Enforcement timeline
Enforcement began incrementally with Spring ’26 Patch 10. The target deadlines for complete organizational compliance are April 7, 2026 for sandboxes and April 27, 2026 for production orgs.
Domains that have been actively sending email within the last 30 days prior to those dates require verification by that deadline. New domains added subsequently, and all domains in newly provisioned orgs and sandboxes, require verification as soon as they first attempt to send.

Leave a Comment